

QuickBooks software has been developed to help small and medium sized businesses in their accounting work. It helps you in maintaining records, in creating records, generating invoices etc. But a few errors sometimes hinder the working of the quickbooks. For instance, QuickBooks error 1904 that appears when the module fails to register.
What is QuickBooks Error 1904
QuickBooks Error code 1904 is an installation error, and it is spotted when your system has some damaged or corrupted file. It may also arise due to improper file location. It is encountered when the required components do not synchronize with each other when the operating system is upgraded. If any case the login issues still exist, then you can reach out to QuickBooks support by dialing +1(888) 910 1619.
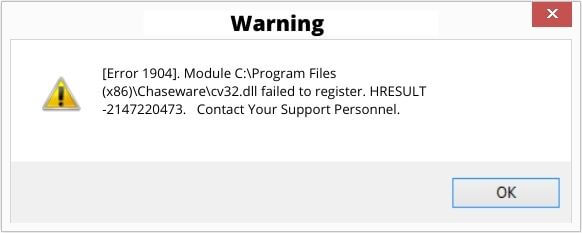
QuickBooks error 1904 comes up with the message stating “[Error 1904] cv32.dII failed to register” and it would not let you use QuickBooks .
| [Error 1904: [File path / name / extension] failed to register]. |
In this article, I will discuss error 1904 and its causes and symptoms. Later, methods to fix this will also be discussed. All the installation errors can be fixed by some very basic troubleshooting.
Read Also: QuickBooks Download for Desktop Pro, Enterprise, Premier, POS, and MAC
Reasons for QuickBooks Error 1904 Module Failed to Register
- It might arise due to low maintenance of your computer.
- Some QuickBooks components are missing or damaged that do not let QuickBooks work smoothly.
- QuickBooks desktop is not yet updated and outdated QuickBooks can result in QuickBooks error code 1904.
- There are glitches in the hard drive read-write.
- Damage in the company file or wrong settings of the company files might cause QuickBooks error code 1904.
- There might be multiple issues in the specific files like dII, qbupdate.exe and others.
Symptoms of QuickBooks error code 1904
- You might not be able to access the company file.
- Any active window may crash.
- System might become sluggish.
How to fix QuickBooks Error 1904?
QuickBooks error 1904 can be annoying at times. It can be fixed by this basic troubleshooting. These are some of the ways to fix QuickBooks Error code 1904:
But before fixing QuickBooks error 1904, keep these factors in mind:
- Windows should be updated in all the computers working in multi-user mode.
- QuickBooks should be updated in the workstation as well as in the server.
- Make sure to refresh the internet and LAN connectivity.
- Remember to use QuickBooks in admin mode only.
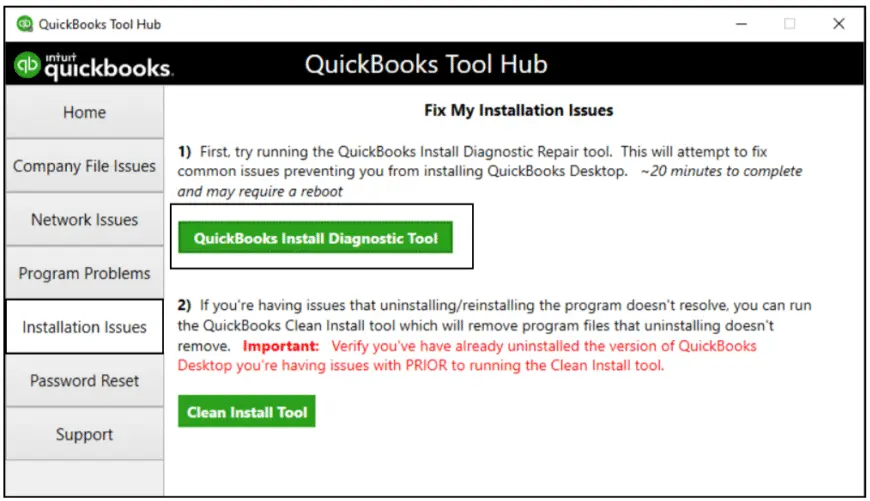
Solution 1: Running QuickBooks diagnostic tool from the QuickBooks tool hub.
- First, you have to download the latest version of the QuickBooks tool hub.
- Click on the QuickBooksToolHub.exe from the download list and follow on-screen steps to install it.
- And, once the installation is done, open QuickBooks tool hub.
- Then select installation issues from the tool hub and it may take up to 20 minutes.
- Once it is done, restart your system.
Solution 2: Fixing windows components manually.
If updating QuickBooks updating QuickBooks does not fix QuickBooks error code 1904 . You can try to fix the error by repairing specific windows components by yourself, but only try this when you are an IT professional.
Solution 3: Changing your windows account settings.
a) Switch to an administrator account to bring some changes.
- Open start.
- In the search box, type ‘CMD’ and then run CMD icon, select it and then select run as administrator.
- In the command window, type ‘net user administrator/active:yes’ and then press Enter.
- Once the command is complete, close this window.
- again , open the windows start menu and then sign out.
- Now you wont need a password to sign in again.
Read Also: Enabling, setting up and fixing view my paycheck issue
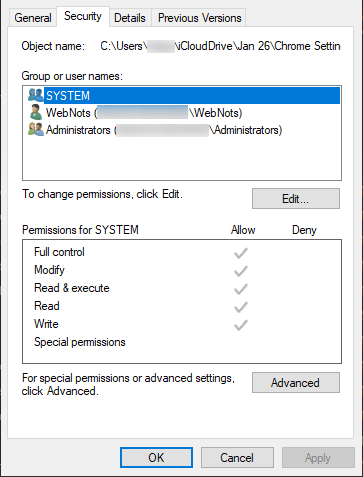
b) Changing the permissions.
- Type ‘File explorer’ in the search box after you click on start menu,
- This will show the file explorer, click on the icon to open it.
- Select properties from the command files.
- Then go to security and then Edit.
- Select ‘users’ from the group or user names.
- Turn on the permissions of : modify, read & execute, list folder contents, read-write in the permissions for user tab.
- Then select the option of Apply and at last click on OK.
c) Reinstalling QuickBooks and then signing out.
- When you finish installing QuickBooks then go to the start menu and then sign out of the administrator account.
- Then sign in with user credentials of the usual account.
- Again open windows Start menu.
- Once the search box opens, type “CMD” in it and make a right click on it to run it and then select the option of ‘Run As Administrator’.
- In the command window, you have to type ‘Net user Administrator/active:no and then click on Enter. It will hide your admin account.
QuickBooks error 1904 which arises due to damaged company files or when the MS visual C++ is damaged can be resolved by simply running the install diagnostic tool or it can also be resolved by activation of the built-in administrator. You need to change the installation directory security settings to fix QuickBooks error 1904.
Solution 4: Login to built in Admin account
Step 1: Activate Built in Admin
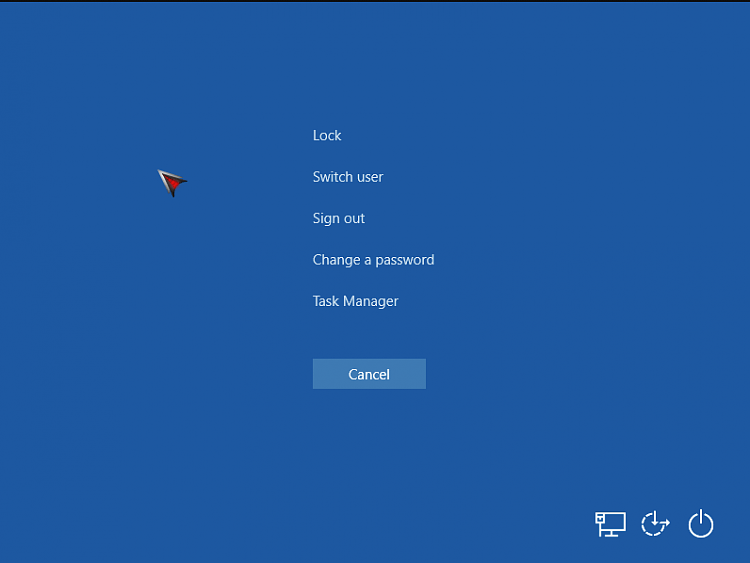
- Go to the start button.
- Select switch user from here.
- You need to select “Default Admin account”.
- Now, press Ctrl+Alt+Delete and then select the switch user tab.
Step 2: Switching Built in Admin Account
- Press Ctrl+Alt+Del and then you should choose the switch user windows 8 option.
- From the windows button, select the user icon followed by pressing Ctrl+Alt+Del.
- Select the Default admin account option.
Step 3: Hide Built Admin Account
- In the window, type cmd and once you see the option, right click the cmd/command prompt/cmd.exe
- Go to the option of Run As Admin.
- Herein, type the net user administrator option/active:no option.
- Press Enter.
Also Read: QuickBooks Database Server Manager be installed and used
Solution 5: Reinstalling QuickBooks
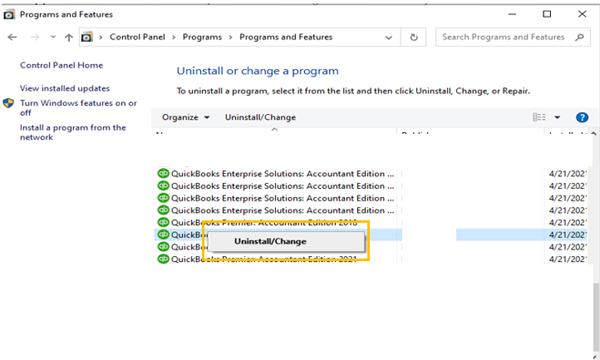
- To commence, you need to go to the control panel.
- Reach the programs and features option.
- Click the uninstall tab.
- From the list of programs, select QuickBooks .
- Moving ahead, uninstall QuickBooks .
- Restart the system.
- Now, you can install the QuickBooks again.
Solution 6: Setting folder access permission.
- Open windows explorer.
- Go to C: \ Program Files \ Common Files.
- You need to right click the common files’ folder.
- Go to properties.
- Click Edit in the security tab.
- Now, in the group or usernames, hover to users.
- You have to select Modify, list folder contents, write, Read and read and execute in the permission for users tab.
- Click Apply.
Solution 7: Manual configuration of damaged windows.
- Reach to the control panel and then choose the microsoft.net framework.
- In the list of installed programs, you have to choose Microsoft framework from the program and features.
- To proceed you have to register MSXML.dII (64 Bit). For this:
- In the start search bar, enter CMD.
- Choose the option to run as admin here.
- When you see the command prompt, type cmd and get the C: root directory.
- You need to locate CD Windows/ syswow64/”.
- Once you locate the syswow64, you must enter regsvr32MSXML6.dII.
- Then try to install Quickbooks.
For 32 Bit OS
- Press windows+R and you will see the run windows.
- You need to click Enter to add cmd to the box.
- Then, enter regsvr32 MSXML6.dII.
- Press Enter.
Now, you can open QuickBooks with your regular account. However, if the issue still persists. You can reach IT experts of QBSsolved at +1 (888) 910 1619 and they will fix your issues in a hustle-free manner.
Read Also:
How to Fix QuickBooks Error code 1904 – Troubleshooting Guide
QuickBooks Error Code 3003: Easy Troubleshooting Steps