
QuickBooks is being used by businesses all over the globe for their accounting and finance tasks. QuickBooks also allows you to create invoices, generate payroll etc. QuickBooks has numerous features which keeps businessmen up-to-date related to their accounting tasks. QuickBooks helps you to reduce your time and effort in managing the financial account related tasks. But, sometimes you might encounter errors on QuickBooks, one such error is QuickBooks Error 12157.
What is QuickBooks Error 12157?
QuickBooks error 12157 can be seen due to improper QuickBooks installation or data connectivity issues. This is a payroll error code also known as update error in QuickBooks. QuickBooks error 12157 is a part of QuickBooks 12XXX error series which you might encounter due to web connectivity issues in operating system with MS win 32 internet or WinInet API. For technical assistance and get it solved from professional QuickBooks Error support team at 1-888-910-1619.
What causes QuickBooks Error 12157?
- There may be active X problems or PC registry errors.
- Firewalls may be restricting setups and internet safety applications.
- Some conditional firewall software settings and web protection applications may appear while updating QuickBooks.
- Various updates of the software for the same year are downloaded in the same system.
- There may be web connectivity issues in the operating system.
- Your system might be having an incorrect date or time.
What are the symptoms of the QuickBooks error 12157?
- You will face the internet problem and security apps would come up while updating Quickbooks.
- You will see a warning message on the screen.
- You might see pop up from firewall settings
- System might behave in a sluggish manner.
How to fix QuickBooks Error 12157?
Method 1: Verifying the date and time in your system.
- Go to the Clock icon from the bottom right corner of your system.
- Select the ‘Adjust Date/Time’ option.
- Now, go to change date and time and then enter correct details.
- Now, you need to close and reopen QuickBooks desktop.
- And, finally update the QuickBooks.
Method 2: Checking the internet connection settings.
- Go to the webpage of chase banking and test the secure internet connection.
- If you are not able to open Chase banking, you won’t be able to update QuickBooks. In this case you need to contact ISP (internet service provider).
- And, if you are able to see the chase banking page, then follow the below mentioned steps:
- Go to help and click on Internet connection setup.
- Choose the option of ‘Use my computer’s internet connections settings’ to establish a connection whenever this application accesses the internet.
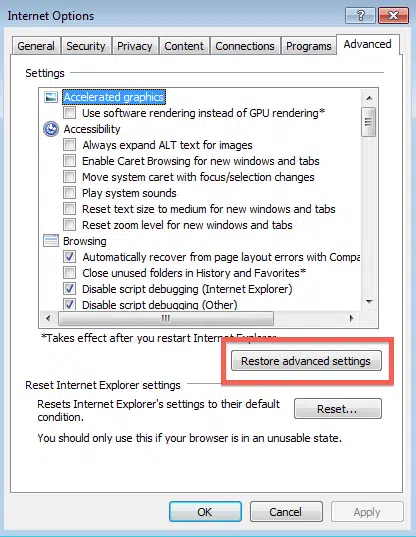
- Now, you have to go to Advanced connection settings and then reach to advanced tab.
- From the Advanced tab, select the option of ‘Restore Advanced settings’.
- Finally click OK and choose ‘Done’.
Method 3:Checking the internet security or personal firewall application configuration.
Please ensure that internet security and personal firewall settings are accurately configured. You need to enable port 80 & 443 and the access must be provided to the below-given field:
- QuickBooksMessaging.exe
- QBServerUtiltyMgr.exe
- QBGDSPlugin.exe
- QBDBMgr.exe
- IntuitSyncManager.exe
- FileManagement.exe
- Dbmlsync.exe
- AutoBackupEex.exe
- DBManagerExe.exe
- FileMovementExe.exe
- QBCFMonitorService.exe
- QBDBMgrN.exe
- QBLaunch.exe
- QBW32.exe
Method 4: Restoring Advanced settings
- First of all, Close QuickBooks.
- Open the internet Explorer.
- Now reach the tools tab from the top right corner.
- Choose Internet options from the drop down.
- Go to the Advanced option and select the restore advanced settings option.
- Close this window.

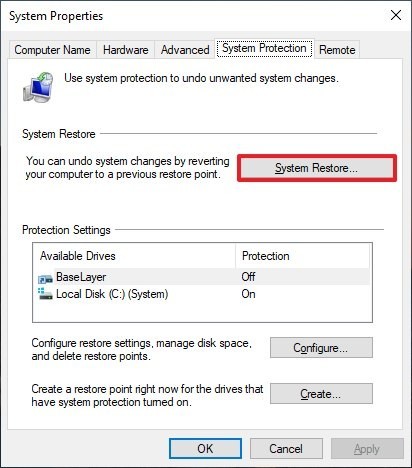
Method 5: Restoring the system
- System restore can also help in resolving QuickBooks error 12157, for this:
- Login to QuickBooks as system administrator.
- Now, press the windows button or the start button.
- Choose All Programs and move to the accessories tab.
- Here, you need to select system tools.
- Select the System restore option.
- In the new window, click on reinstall this PC and now press Next.
- Now, you need to choose the system restore point and click Next.
- Reboot the system to save the changes.
We understand that some of the issues cannot be resolved manually. So, if you need further assistance to fix QuickBooks Error 12157 you can reach out to us at +1(888) 910 1619 a and we will be assisting you in all your issues.