
QuickBooks keeps on bringing the new updates in QuickBooks which makes the working on QuickBooks smooth and convenient. QuickBooks’ wide range of features also consist of finance management, invoice generation and payroll services etc. It becomes very daunting when you see QuickBooks payroll errors in QuickBooks. But QuickBooks might encounter certain errors associated with the payroll services of the QuickBooks. One such QuickBooks payroll error is QuickBooks error 12002. This error may have occurred due to internet explorer settings or wrong firewall setup. QuickBooks error 12002 can restrict you from using QuickBooks payroll services.. In the article below, we will try to discuss the causes and some of the basic ways to get QuickBooks error 12002.
What is QuickBooks error 12002?
Let us take a quick insight of QuickBooks error 12002:
QuickBooks payroll services can be used online and for this you need to have a working internet connection. Some sort of issues on the internet can result in QuickBooks error 12002. You might also see some other errors due to internet issues, like QuickBooks error 12057 or QuickBooks error 12007. QuickBooks error 12002 might also happen due to network time-out or slow internet connectivity. For technical assistance and get it solved from professional QuickBooks Error support team at 1-888-910-1619.
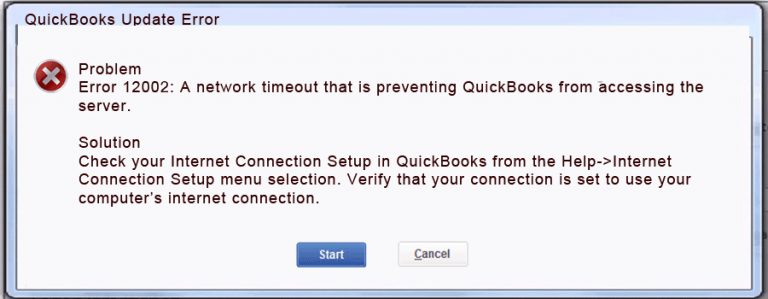
| QuickBooks update Error | Error 12002: A Network Timeout that is preventing QuickBooks from accessing the server. |
What are the causes for QuickBooks error 12002 to come up?
Causes for occurrence of QuickBooks error 12002:
- Windows firewall settings may not allow QuickBooks to connect with websites.
- Issues in Internet explorer configuration.
- Internet explorer is not the default browser.
- Issues in installing QuickBooks desktop.
- Slow internet connection.
- QuickBooks might not be updated.
- Wrong SSL settings.
- QuickBooks unable to access the server.
What are things to remember before resolving QuickBooks error 12002?
Things to keep in mind before fixing QuickBooks error 12002:
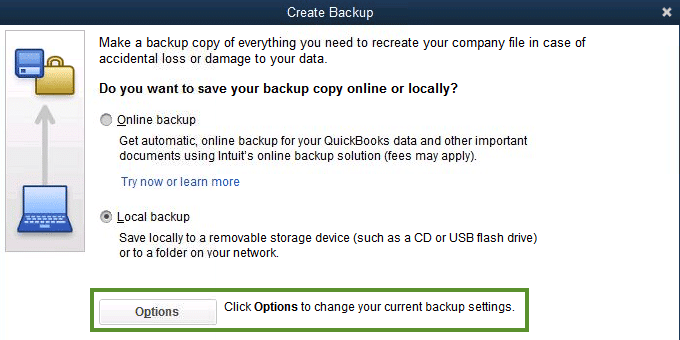
Step 1: Creating a company file backup.
- Open QuickBooks and then file menu.
- Click on the option of backup company file.
- Proceed to create a local backup.
- Follow onscreen steps to create backup.
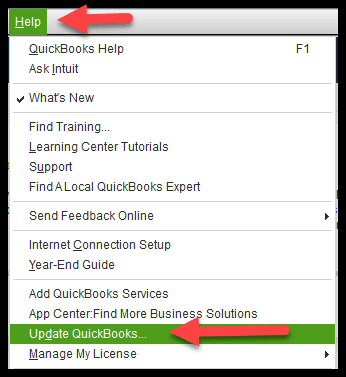
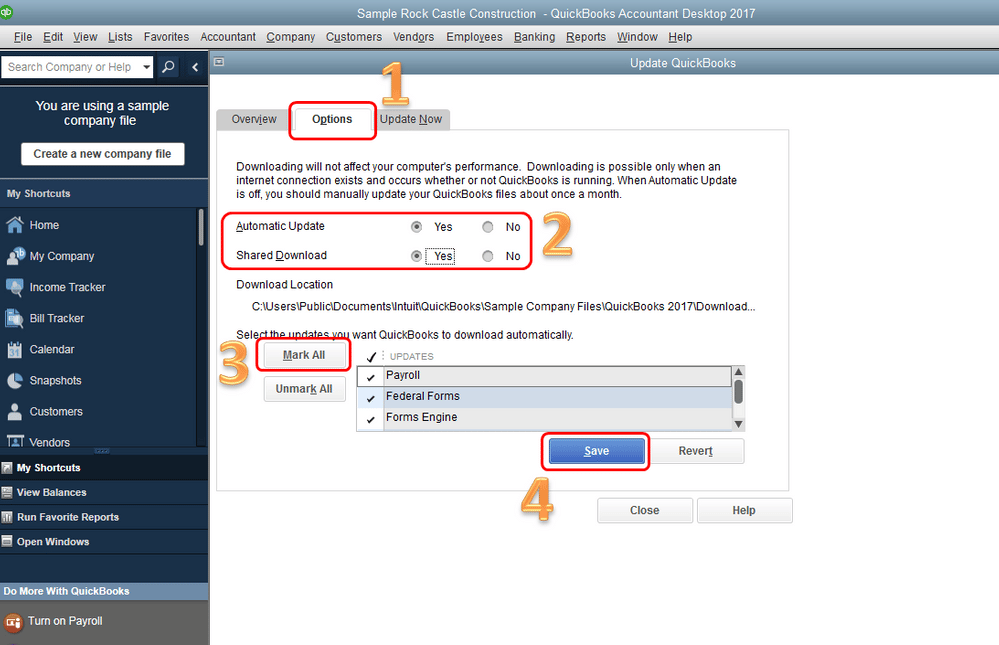
Step 2: Updating QuickBooks
- Open QuickBooks’ help menu.
- Select update QuickBooks option.
- Click on get updates and wait till the updates are done.
NOTE: QuickBooks error code 12002 can be triggered by a corrupt internet explorer. This is how we can repair internet explorer:
- First you need to see that some add-ons are not creating problems. For this, you must run internet explorer without any add-ons:
- Go to the start menu and reach the programs.
- Select the accessories tab and reach the system tools.
- Proceed to click on Internet explorer without add-ons.
- When you see a problematic add-on and disable it from the internet explorer.
What are the ways to resolve QuickBooks error 12002?
Here are some of the ways to get rid of QuickBooks payroll update error 12002:
Solution 1: By verifying internet connection.
- Open QuickBooks followed by selecting Internet Explorer from the help menu.
- Click on Internet connection setup.
- Make sure that the connection is set to utilise your computer’s connection to establish a connection when this application access the internet.
- Click on Next.
- Update and see if the QuickBooks error 12002 is fixed.
Update QuickBooks
- For updating QuickBooks 2008 and recent versions:
- Go to the help menu and move to the update QuickBooks option.
- Now, click on the update now option.
- For QuickBooks 2006 and older versions:
- Choose the file menu.
- Go to the update QuickBooks option and then click on update now.
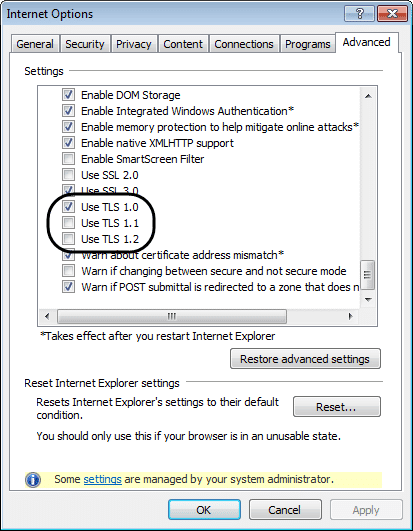
Solution 2: By configuring internet explorer settings.
- In the internet explorer, go to gear on the top right corner.
- Choose the internet option and then go to the security tab.
- Click on the globe icon.
- Make sure that security is not set to high.
- In the connections tab, select Never dial a connection.
- Click ok.
- Checkmark the option of Automatically detect settings in the LAN settings.
- Also, uncheck a proxy server.
- Proceed to enter the correct address and port number.
- Do not uncheck the proxy server if the port number shows 80.
- Click ok.
- Go to the advanced settings option.
- Click on restore advanced settings.
- Checkmark the Use TLS1.2 box and click ok.
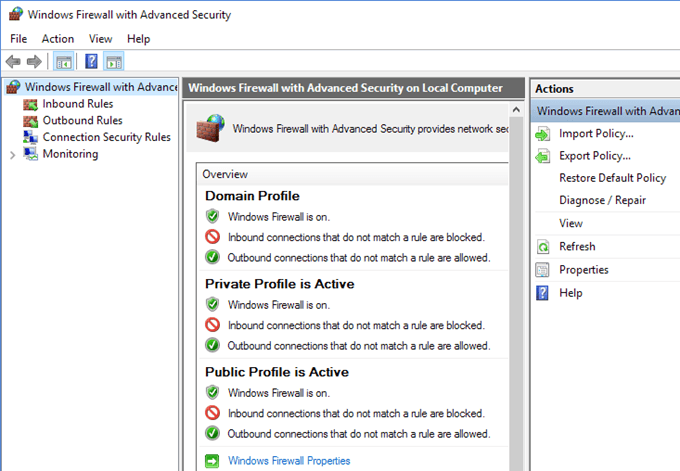
Solution 3: Adding QuickBooks to window firewalls’ exception port.
- Go to the start button and type windows firewall.
- From the top of the list, click on windows firewall.
- Reach the advanced settings.
- Right click on inbound rules.
- Select the new rule and then choose the port.
- Make sure to choose TCP after clicking Next.
- Enter the correct port for your QuickBooks’ version.
[For QuickBooks 2009, port number is 8019 and for 2018, port number is 56728, 55378 and 55382].
- Make sure to check mark all the profiles that are shown in the popup.
- Click Next and also write a new name for the rule.
- Now, click on finish and you need to follow the same steps to set the new outbound rules.
Solution 4: Setting up Internet connection.
- Open QuickBooks.
- Go to the help menu.
- Go to the internet connection setup.
- Check the option of Internet connection setup.
- Click on Internet connection setup.
- Click on Next.
- Update the QuickBooks desktop.
Solution 5:Updating QuickBooks desktop
- To resolve QuickBooks error 12002, you need to update QuickBooks. For this:
- Open QuickBooks and then ‘help’ menu.
- Select internet connection settings.
- Click on Next.
- Now, open the file menu.
- Click on update tab and then now update now option.
- Choose the file menu and select Update now.
Solution 6: Installing/uninstalling QuickBooks selective startup mode.
STEP 1:
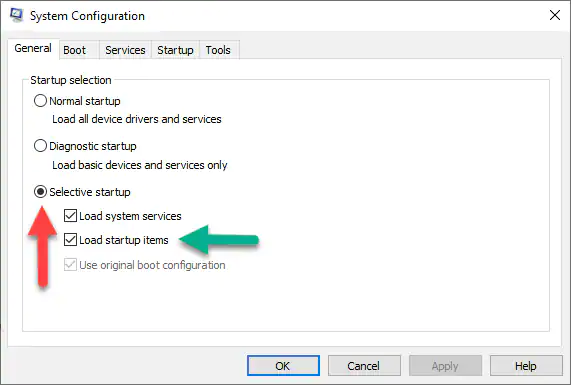
- Firstly you need to start the system in selective startup mode.
- For this: Open run command and type msconfig.
- Click OK and the general tab.
- Then, select Selective startup.
- Click on services option and then hide all microsoft services.
- Choose to disable all.
- Now, uncheck the option of Hide all microsoft services.
- Select the box of the window installer.
- Restart the system configuration.
STEP 2:
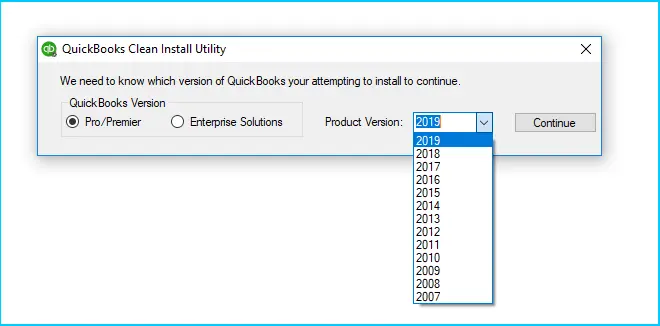
- You need to restart the system, and clean install the Quickbooks.
STEP 3:
- After installation is over, you need to restore the system to the normal configuration.
- For this:
- Reach the command box and press Win+R.
- In the box, type msconfig followed by pressing OK.
- Opt for normal mode in the general tab.
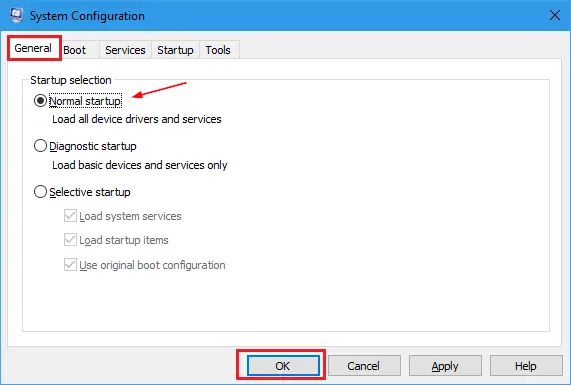
- Press OK.
- On the system configuration window, Select Restart.
Solution 7: Updating Chrome Browser
- To start with, reach the chrome browser.
- From the upper right section, go to the more button.
- Now, choose the option to update Google Chrome
- Wait till the update is over.
- You can relaunch chrome once the updates are done.
If QuickBooks still shows you the QuickBooks error code 12002, you need to exclude QuickBooks from the list of blocked programs. You can do this by:
Microsoft keeps adding new updates to its features. Security feature of Microsoft provides the crux of firewall settings. But these settings might also block some important websites like Quickbooks. This inbuilt firewall works fine and blocks all the malicious websites. How to add QuickBooks to the list of the exception of firewall settings:
- Open windows defender security centre.
- Choose the firewall and network protection.
- Make a click on ‘Allow an app through firewall’.
- Click on Change settings.
Ensure that you have administrative privileges. - From the list, proceed to add the website or you can also manually add the app.
- Proceed to choose the type of network which app needs to access.
Hopefully, QuickBooks error 12002 is now fixed and you are good to go!! All these basic methods were helpful in fixing QuickBooks error 12002. But if you still feel that you are stuck on QuickBooks Error 12002, you can connect to the team of experts at QBS Solved at +1(888) 910 1619.