Intuit QuickBooks Workforce makes sharing of paycheck information much easier for employers with their employees. Once the it is activated, the employees get control over reviewing their W-2 forms and paystubs. Here we will cover the ins and outs of the workforce online portal. Further we will help you to set up the service for you and your employees.
What is QuickBooks Workforce?
It allows the employees to access and print their W-2 forms and pay stubs online. Employers need to set their staffs in QuickBooks force, once this is done, employees get notified of their paychecks after payroll is run. This helps employees in viewing their payments online at any time. This happens as the workforce integrates with the company’s existing payroll service.
It allows employees to access pay stubs and tax information 24/7 which was under purview of Intuit’s view my pay check service. Now Intuit has migrated view my check’s feature in workforce service with the same capabilities as earlier.

How does QuickBooks workforce function?
It has simplified the way employees access and review paycheck with complete security online. QuickBooks workforce is a web-based solution which is completely compatible with any QuickBooks version after 2009.
Employees who are already using Intuit’s payroll and accounting services can login to QuickBooks workforce by using the same login credentials and it is ready to use. QuickBooks and workforce integration means employees can easily toggle on the workforce service with QuickBooks desktop payroll cloud service windows. Once the Update in QuickBooks is approved, you can then invite your employees to use the workforce service or notify them.
QuickBooks online payrolls also enable employers to invite employees to start using the workforce. Employee access to the workforce is provided in all the versions of QuickBooks online.
Also Read: How to Fix QuickBooks Desktop Payroll Error PS058?
How much does the QuickBooks workforce cost?
It costs nothing and any existing QuickBooks desktop or online users can switch on to QuickBooks workforce feature. You can enjoy this feature at no additional cost. Workforce is a pre-loaded feature that comes up as QuickBooks desktop feature.
You must ensure that you have the basic or enhanced version of QuickBooks desktop payroll so as to activate the workforce service.
It is supported by all QuickBooks online payroll versions. It means that they are only required to pay regular subscription fees for QuickBooks online payroll or desktop payroll.
Also Read: Ways to resolve QuickBooks Error code 6154
Perform setup of QuickBooks workforce in QuickBooks online payroll
Setting up it is quite simple and it requires only a few steps. Once the employees get access to the workforce service, you can instantly start reviewing their pay stubs and W-2.
Step 1: Adding employees.
- From the payroll tab, reach the employees section.
- Employers can select add Employees as well as their email address for inviting them to review paychecks.
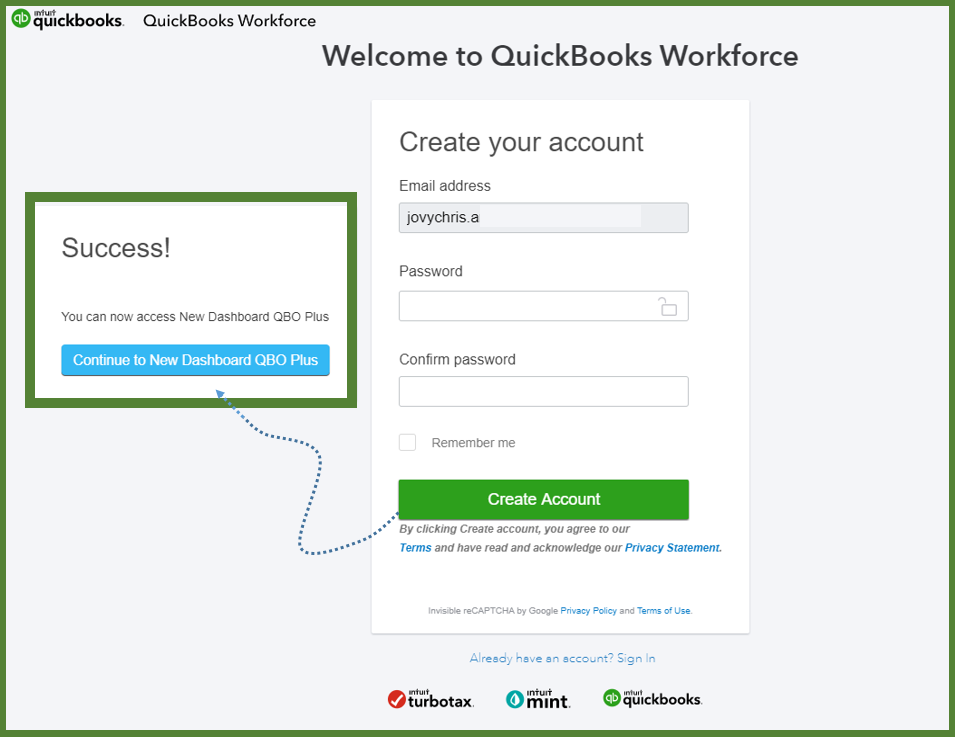
Step 2: Ask Employees to set up their account via email.
- Once the employees are invited through the QuickBooks online payroll centre, ask your employees to add their information.
- Once the information is added their W-2s and pay stubs.
Step 3: Add Tsheets time tracking
QuickBooks online users having Premium and elite plans can use their Tsheets for time-tracking, for this you have to send invitations to employees for access.
Also Read: How can QuickBooks Desktop be unfreezed
How to get QuickBooks workforce started in QuickBooks Desktop
Step 1” Activating QuickBooks Workforce as an Administrator.
It can be activated immediately as soon as you login from the QuickBooks desktop. Make sure the QuickBooks is being used in the latest version and updates to payroll are downloaded and installed. If it is not updated, your employees might face issues while trying to sign in or accept the invitations to start the workforce.
Once the QuickBooks is updated, access the managed payroll cloud service windows from the employees tab. You will also see a prompt to activate it with an/off toggle. Toggle force should be on and it should apply your changes and then return to the main screen of QuickBooks desktop.
Step 2: Uploading Historical Paycheck Data
For actually checking the payment documentation by the employees, you need to upload their paychecks to QuickBooks workforce. The historical paycheck data can be uploaded using these simple steps, You should send a void payroll directly to Intuit, you should make sure to select the appropriate date range for your historical paycheck data and then upload and send the current calendar year paycheck with the PIN that you use for Intuit QuickBooks.
Step 3: Invite your employees to QuickBooks workforce.
Move to the same managed payroll cloud services window that was used to activate the workforce to invite the employees from a preloaded list.
You can have as many employees you want provided they have already set up their accounts.
Your employees should enable notifications for new pay stubs as they become available to the workforce and add necessary personal information like W-4 and bank account number etc.
For it, you will get an email from the employer. You need to set an account and you are good to go. You can see pay stubs. Reach the paychecks section to view pay stubs based on the date range that is defined in the workforce. You can download and print paychecks from the same section. You can download all the paychecks at once.
If you have any queries regarding QuickBooks workforce. Please feel free to reach out to QuickBooks Support QBS Solved at +1(888) 910 1619.
Also Read:


