
QuickBooks software is provided by Intuit that has desktop and accounting applications and also the cloud based application that allows you to process bills and business payments. Ease of using QuickBooks has made it the most reliable accounting software. But sometimes this working can be hindered by errors like QuickBooks error 6000, 832 that typically lands due to corrupted or damaged company files.
What is QuickBooks error 6000, 832?
QuickBooks error 6000, 832 is an error that typically belongs to the 6000 series error of Quickbooks. This error comes up due to a damaged company file in QuickBooks. QuickBooks error 6000, 832 is a technical snag that would not allow you to use or access the company files.
What results in QuickBooks error 6000, 832?
- Company files may be opened on other workstations.
- Company files would have been hosted using different workstations.
- QuickBooks installation files could be missing.
- Permissions for Network server may not be provided.
- Work might be done on Non-US or Canadian edition of windows.
- Wrong file extension may be used.
- QuickBooks files may be inaccessible due to antivirus.
Resolve QuickBooks error 6000, 832
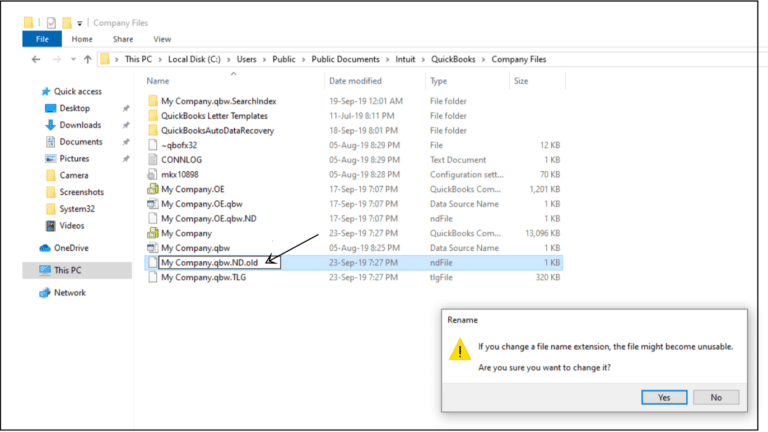
Method 1: Modifying Name of .ND and .TLG file.
- You must locate the folder that contains the company file.
- Open the file.
- Secondly, you should look for the files having the extension .ND and .TLG extensions.
- Individually, right-click each file.
- Select the option of rename.
- Moving ahead, rename the file by adding .OLD with the new name of the file.
- Post this step, try to open QuickBooks and check if the QuickBooks error 6000, 832 is fixed. If the error 6000, 832 is still bothering you, move to the next step.
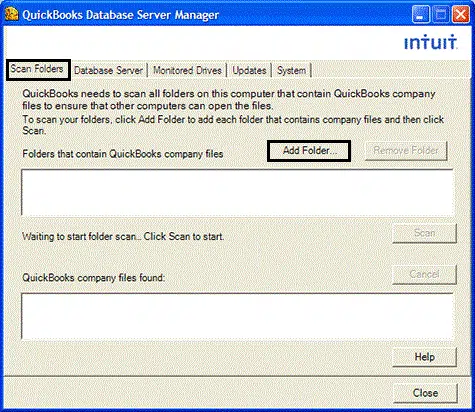
Method 2: Use QuickBooks database server manager.
- Open the windows start menu.
- Select all programs.
- Look for QuickBooks and then open QuickBooks database server manager.
- Click on Scan folder and if you do not see any folder, you must make a click on add folder.
- Along with Quickbooks, also login to the company file using admin ID and password.
Method 3: Updating QuickBooks
- Close QuickBooks if it is opened.
- Move to the QuickBooks again and make a right-click on it.
- Select the option of Run as admin.
- Move to the no company screen.
- Go to the help menu and then update the QuickBooks by selecting Update Quickbooks.
- Click on Mark all checkboxes from the options.
- Click Save and then choose Update now.
- Click on the reset update box.
- Install the update once these updates get downloaded.

Method 4: Checking for permissions
- To begin with you should move to the QuickBooks folder consisting of the company file.
- Now, right-click the folder and move to the properties tab.
- Reach the advanced option and then make a click on it.
- Select QBDataServiceUserXX and then reach the Edit option .
Set the permissions by following these settings:
- Read Attributes.
- Write attributes.
- Create folder/Append data
- Read permissions
- Write extended Attributes.
- Read extended attributes.
- Traverse folder/ execute file.
If these permissions are not accurate, then:
- Right click the folder having the QuickBooks company file.
- Move to properties followed by the Security tab.
- Select the Edit option and choose QBDataserviceUserXX and then select full control in order to give access.
- Click OK after applying the changes.
Method 5: Verifying hosting on All Systems to be turned off.
- Press F2 from the keyboard and you will see the information window.
- Click on the option of Local server.
- You need to verify that the hosting is switched off.
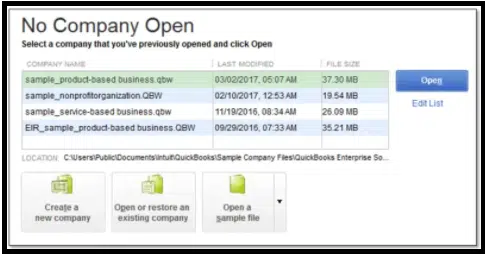
Method 6: Opening the Sample company file.
- Move to QuickBooks icon and right click the icon.
- Go to the ctrl key and hold it.
- Select the Run as Administrator.
- Once you see the no company window, leave the Ctrl key.
- Open the sample company file.
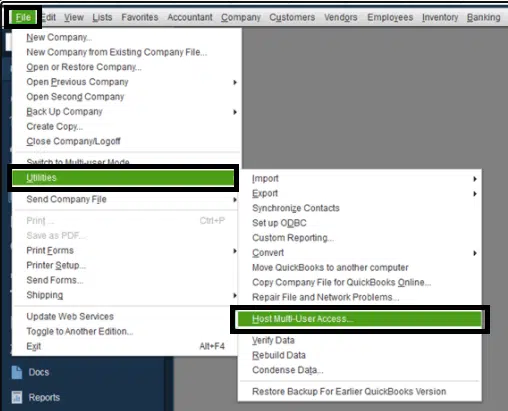
Method 7: Stop multi user access hosting.
- Turn on the QuickBooks desktop.
- Move to the file menu and select the utility option.
- Select the Stop hosting Multi-use access.
- You will see the option to stop hosting multi-use access from another workstation.
I believe QuickBooks Error 6000, 832 is fixed by using the methods that has been discussed.
If you still need expert assistance to resolve QuickBooks error 6000, 832, feel free to connect to QBS Solved at 1-888-910-1619. and our online support team is available round the clock to help you in fixing QuickBooks error 6000, 832.
Also Read: